If you want to enable multisignature to improve the security of your Stellar wallet, this article will show you how to do it in your LOBSTR account.
Scroll down to the 2nd part of the guide to check out the steps needed to enable multisig on LOBSTR mobile apps.
To learn more about multisig basics and LOBSTR Vault app features, please visit LOBSTR Vault Help Center.
LOBSTR WEBSITE
1. Go to the 'Multisig' section on the 'Settings' page and click the 'Enable' button.

2. Copy the public key of the account that will co-sign the transactions from LOBSTR Vault app or your other multisig provider.
The public key of your Vault signer can be found on the 'Home' or 'Settings' screen of the LOBSTR Vault app.
Alternatively, you can click the 'Add Account' button on the 'Home' screen. Scan the QR code or copy the Vault public key if you want to add the signer in another service.

3. Specify the signer public key in the corresponding field of the LOBSTR web app and click the 'Add Signer' button.

Note: Make sure your account has enough XLM to meet the minimum XLM reserve requirement. Learn more about minimum Stellar wallet balance here.
4. Click the 'Continue' button to add the signer.
Once multisignature is configured, you'll be able to check your account and signer keys under the same 'Multisig' tab.

LOBSTR MOBILE APPS
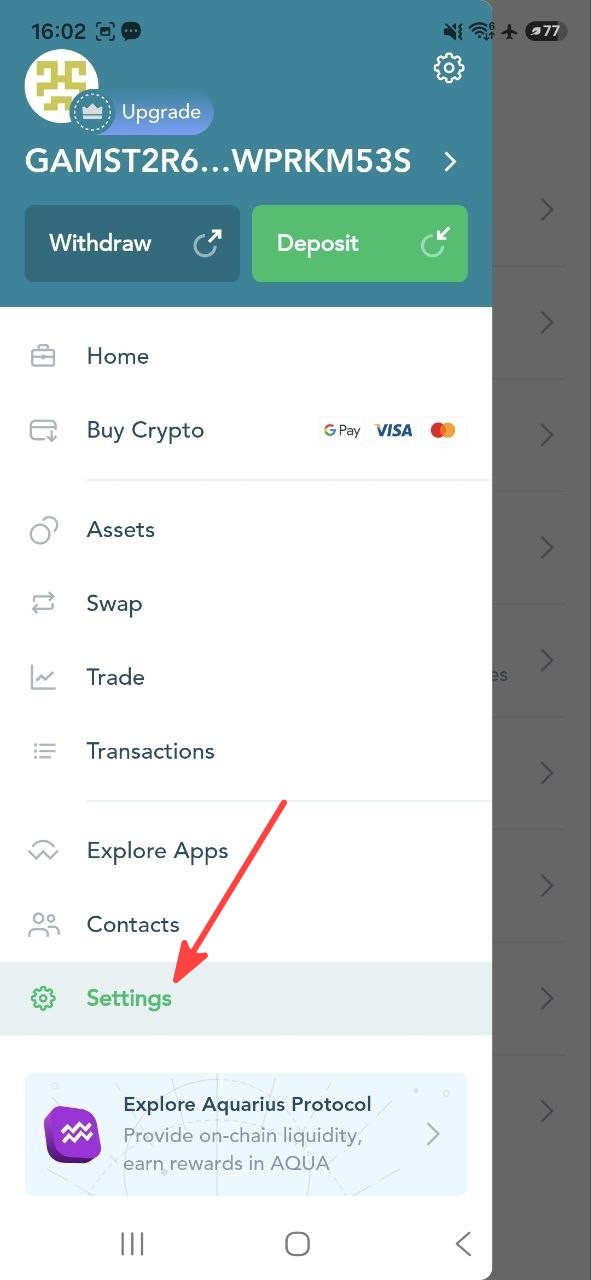
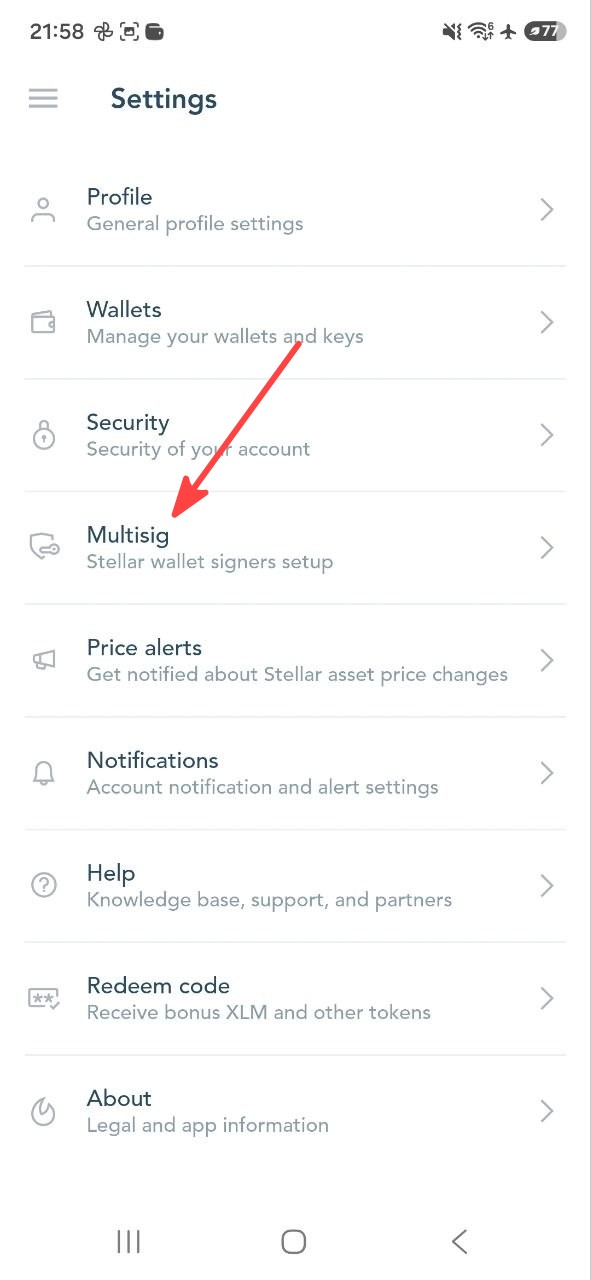
1. Open 'Settings' from the left side menu and choose 'Multisig'.
 |  |
2. Tap 'Enable Multisig' -> 'Yes, Use This Device' -> 'Continue' if you're using LOBSTR Vault on your current device.

If LOBSTR Vault is installed on another device or you've chosen another multisig service, push the 'Enter Signer Key' button and proceed with the steps described below.
3. Insert your signer public key and tap 'Add Signer'.

Note: If you're entering a non-Vault account public key, you will be offered to choose a preferred provider such as StellarGuard or another multisig service.
4. Confirm adding a signer to your Stellar wallet by tapping the 'Continue' button.

Congrats, multisignature protection for your Stellar wallet is enabled! To view the list of your signers, use the 'View Signers' button on the 'Multisig' screen.

If you encounter difficulty at any step of enabling multisig for your Stellar wallet, please contact LOBSTR support with a detailed description of the problem you have, attaching screenshots of each step you've made.
Was this article helpful?
That’s Great!
Thank you for your feedback
Sorry! We couldn't be helpful
Thank you for your feedback
Feedback sent
We appreciate your effort and will try to fix the article